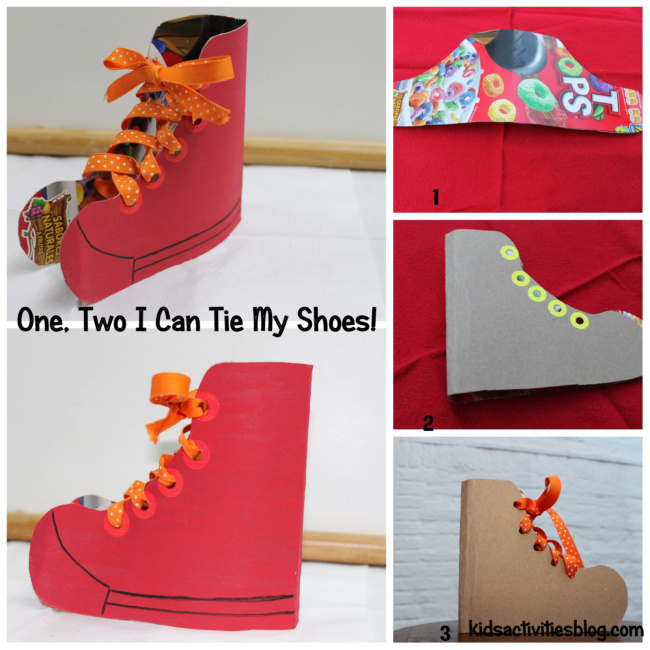
This easy activity is a great way for your child to develop fine motor skills, hand eye coordination, and practice tying their shoes! You can create a practice shoe with items you might just have at home already. If not, you can find them at your local dollar store and Wal-Mart. We adapted this idea from Kids Activities Blog.
Supplies:
-thin cardboard (cereal box is perfect)
-hole puncher
-scissors
-reinforcement stickers
-shoe laces or ribbon
-markers, crayons, or paint (or even glitter!) to decorate the shoes
Flatten out your cereal box and draw the side of a high-top tennis shoe, like a fat uppercase L, and then draw the mirror image, with the backs of the L’s touching. So when you fold the pattern towards you it makes a three dimensional shoe.
Next, use the scissors to cut your traced shoe, and with the hole puncher make four to five holes on each side of the shoe. Then take the reinforcement stickers and place them in both inside and outside of the punched holes. These stickers will help make the holes more durable and keep them from tearing right away.
Your child will like this step, have them paint or color the shoe however they please.
Last step, get the laces or ribbon and lace the shoe up. Then have your child unlace the shoe, and then lace it up again together. Continue demonstrating until they understand the process and feel comfortable trying it out themselves. Remind them it’s okay if they don’t get it right away. Practice makes perfect! Hopefully getting to create their own practice shoe will get the kiddo excited about learning the new skill!


No comments yet.